
After Effects - Search and Replace Plugin
WARNING: this is an experiment of mine so if you have any bugs please report them so I can tackle it ASAP, also if you have any feature requests let me know.
It’s as simple as that!
I wanted a quicker way to replace a layer with different footage without messing with the already existing animation, as it can take that long to do it manually when you have a large number of comps with a deadline looming, I felt that a tool like this would save a lot of time and effort and it does save time!
Search and Replace User Guide (v1.1.1)
Installation
- Locate the script file: SearchAndReplace.jsx.
Copy it to your After Effects Scripts folder:
Mac: /Applications/Adobe After Effects [Version]/Scripts/ScriptUI Panels/
Windows: C:\Program Files\Adobe\Adobe After Effects [Version]\Support Files\Scripts\ScriptUI Panels\
Restart After Effects.
You can now access the tool via the Window menu (look for SearchAndReplace.jsx at the bottom).
How to Use
1. Preparation
Open your project in After Effects.
Ensure any replacement footage or assets are already imported into your Project Panel.
Important: For the Footage and Text features, you must highlight (select) the target compositions in the Project Panel before executing the script.
2. The Interface
The plugin is divided into three powerful tabs:
Footage Tab
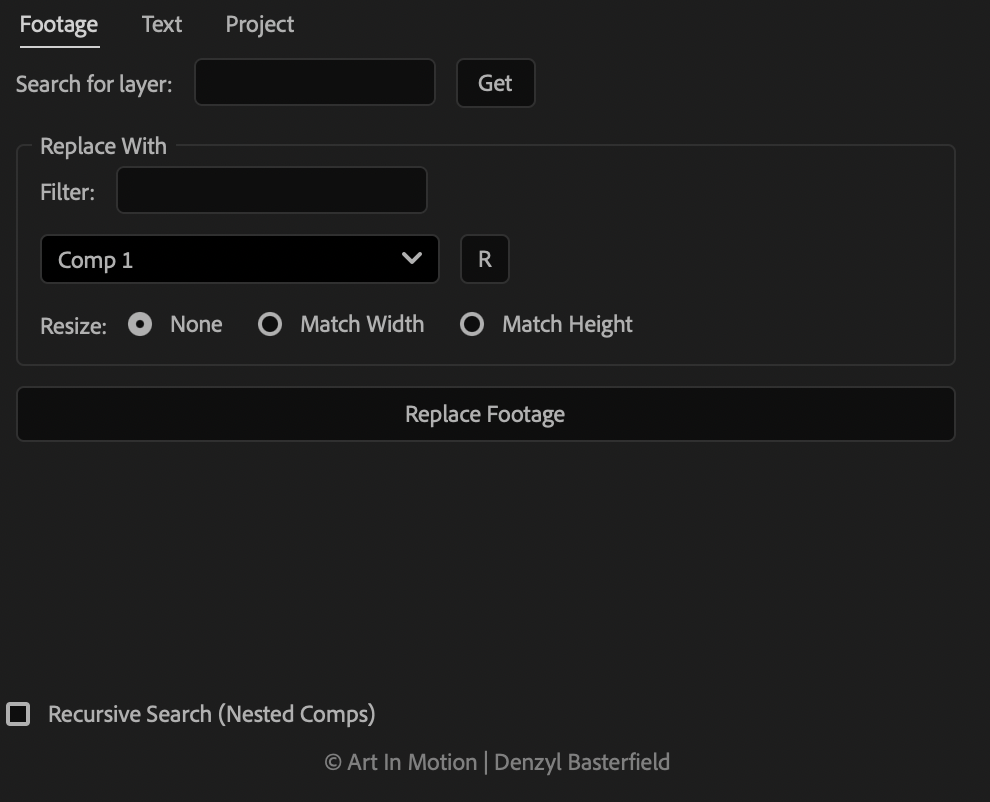
Search for layer: Type the layer name manually.
“Get” Button: Select a layer in your active timeline and click Get to auto-fill its name.
Filter: Type part of a footage name to quickly filter the dropdown list.
Dropdown: Select the target footage or comp to use as the replacement asset.
“R” Button: Click this to refresh the list if you’ve recently imported new items.
Resize: Choose how the replacement asset scales to fit the original layer:
None: Applies the footage at its native size.
Match Width / Match Height: Automatically calculates and applies a new scale to match the original layer’s dimensions.
Text Tab
This tab handles both text strings and full styling upgrades.
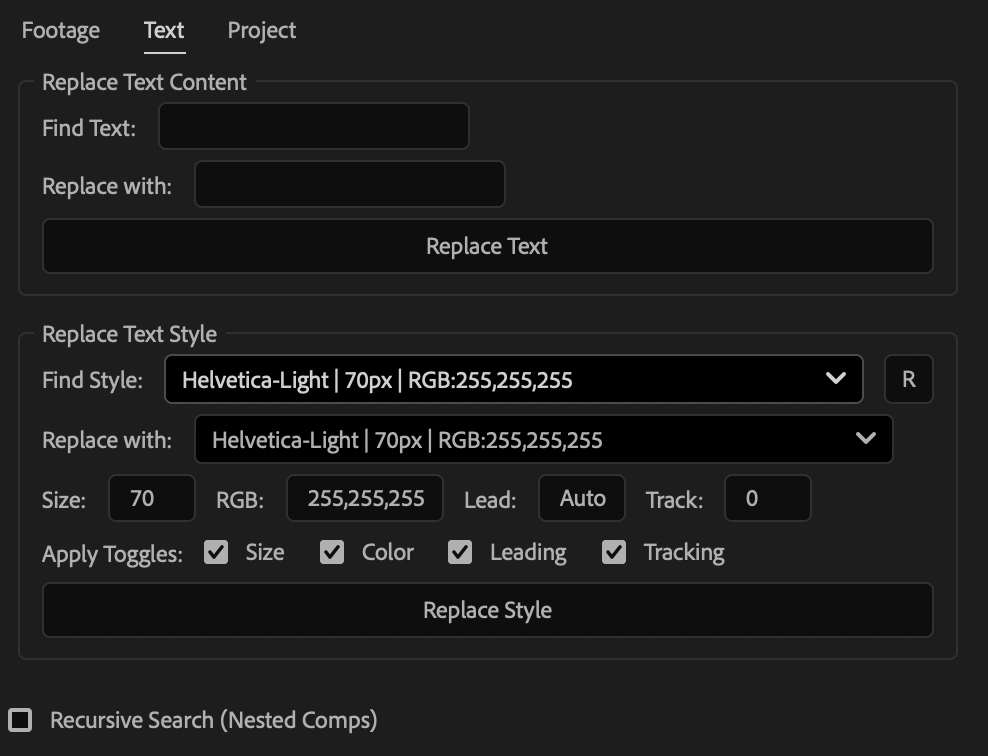
Replace Text Content: Find a specific string of text (e.g., “2023”) and replace it with a new string (e.g., “2024”). This scans your selected comps and updates the text string without altering the fonts.
Replace Text Style:
The script automatically scans your project and generates unique “Visual Signatures” (combining Font, Size, Color, etc.) for every text style in use.
Select the Find Style you want to replace.
Select a Replace with style to act as your source.
Editable Overrides: Upon selecting a replacement style, the properties panel (Size, RGB, Lead, Track) will auto-populate. You can manually type in these boxes to tweak the design right from the UI!
Apply Toggles: Use the checkboxes to choose exactly which attributes you want to overwrite on the target layer.
Project Tab
A batch-renaming tool for your Project Panel.
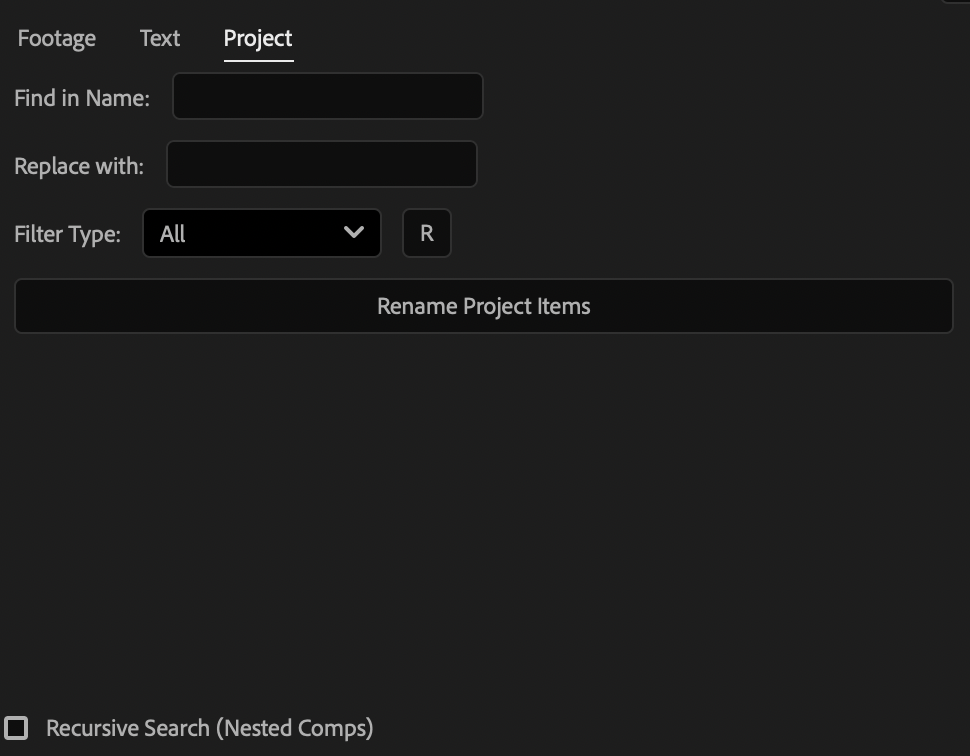
Find in Name: Enter the part of the item name you wish to replace.
Replace with: Enter the new naming convention.
Filter Type: Target specific asset types (Compositions, Folders, Solids, or specific file extensions like PNG or MP4) to prevent accidentally renaming the wrong items.
Shared Options
Recursive Search:
Unchecked: Replaces layers only in the top-level selected comps.
Checked: Looks inside the selected comps AND digs deeply into any nested pre-compositions inside them.
3. Execution
Select your target compositions in the Project Panel (unless using the Project Renamer).
Configure your tab settings.
Click the respective Replace or Rename button at the bottom of the tab.
A summary popup will confirm exactly how many comps were processed and how many layers/items were successfully updated.
Features Summary
Non-Destructive Replacement: Preserves all layer properties (Transform, Effects, Masks, Keyframes) by using the native “Replace Source” function. Text styling replaces the layout while keeping original text characters intact.
Smart UI Filtering: Quickly find your replacement asset or style among hundreds of project items.
Granular Control: Toggles and editable fields let you cherry-pick exactly what formatting gets applied during text replacement.
Deep Recursion: Deeply nested placeholders and sub-comps can be swapped in one go with a single click.
Troubleshooting
Nothing happened? Make sure you have Compositions selected in the Project Panel, not just open in your timeline.
Layer didn’t change? Ensure the layer name matches exactly (case-sensitive). For footage replacements, ensure the target layer is an AV Layer type that supports source replacement (images, videos, solids, pre-comps).
Missing a new font or footage? Click the “R” (Refresh) button next to the dropdowns to force the script to re-scan your project for the latest imported assets and text styles.
Updates
Update 1.1.1 – Search a replace font and text settings – 10 May 2026
You can now update fonts and text settings across your project without needing to go into individual comps for quick font changes,
Update 1.1.0 – Search and Replace Text – 13 Feb 2026
Now the plugin not only worked with footage but you can replace text in a comp still needs more testing the feature is functional.